Carpet Tiles are the best flooring option to improve the appearance of your home and office floor. These custom tiles are easy to maintain and replace, and are the best option for both business and home places. To provide extra strength to your floor, you need to install them with the right tools and methods. This article will help you learn the methods to install your carpet tiles with adhesive like a pro. Whether you are a new or a DIY homeowner, this blog will help you work without any hesitation.
How to Install Carpet Tiles with Adhesive?

Why Choose Carpet Tiles in Dubai?
Before diving into the fixing procedure of carpet tiles, you must understand why there is a requirement to select the carpet tiles.
- These carpet tiles require no extension or tracking.
- You can select custom designs in many patterns and colors.
- You also have the choice to change damaged tiles.
- These carpet tiles are pocket friendly and perfect for tight budgets.
- They offer easy cutting and fit quite well into awkward areas.
Tools and Materials Needed
Before beginning the installation and fitting process, make sure you have the following quality materials and tools:
- Carpet Tiles
- High-end adhesive
- Adhesive roller
- Sharpe knife
- Measuring tape
- laser level or Chalk line
- Straightedge or metal monarch
- Pads for the Knee
- Broom or Vacuum cleaner
- Face Masks and Safety Gloves
Installation Steps for Carpet Tiles

Prepare the Floor Surface
Proper Floor surface trail is key to getting correct results. Begin by clearing your bedroom or the room where you plan to install tile carpet. Then, remove floor rugs or carpets, furniture, and other things out of the path. Check the floor surface or the room entirely.
- Tiles and carpets are the most suitable covering for plywood, concrete and vinyl floorings.
- Dust and rubble are to be removed by sweeping, vacuuming and cleaning the floor.
- Make the surface even and smooth by using a floor levelling compound to fill the gaps and cracks.
- Do not fix Carpet Tiles on dusty, moist and greasy surfaces. These surfaces withstand the bonding of adhesives.
Plan Your Layout
For a symmetrical and balanced look, there will be a proper resolution of these tiles.
Find The Center of The Room
In the same way, measure and lay marker lines widthwise, corner to corner, and lengthwise for the other pair of corners. They together form the room center.
Dry Lay the Tiles
You can determine how much area the tiles will cover by putting some of them down without glue. This technique will also help you to discover their symmetry and the location of their intersection will be the center of the room.
Choose Your Layout Pattern
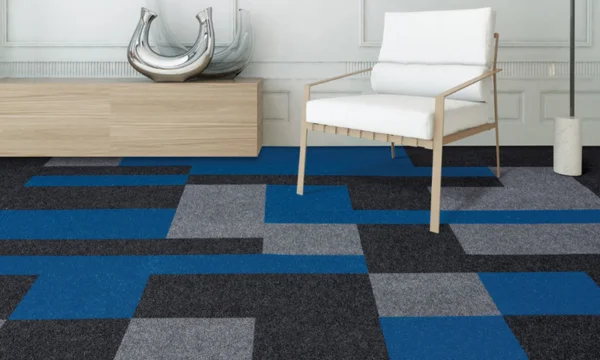
There are multiple layout textures and patterns you can select from to install your carpet tiles. In the Monolithic pattern, all carpets are installed in the same direction. On the quarter turn pattern, every tile is turned 90 degrees. Meanwhile, the Brick or Ashlar pattern has tiles changed in staggered columns and rows.
Apply the adhesive
After alignment, the next step is to apply glue. It is always good to use a pressure sensitive adhesive that makes repositioning possible before the adhesive reaches its final bond.
- The first step is to apply the glue in small sections, and then use a toothed spatula to spread the adhesive evenly.
- When the adhesive is already there, let it dry just enough to become tacky. Based on the room conditions and air moisture, let it sit for 15-30 minutes.
- It is essential to follow the manufacturer’s instructions whenever dealing with strong adhesives.
Install the Carpet Tiles
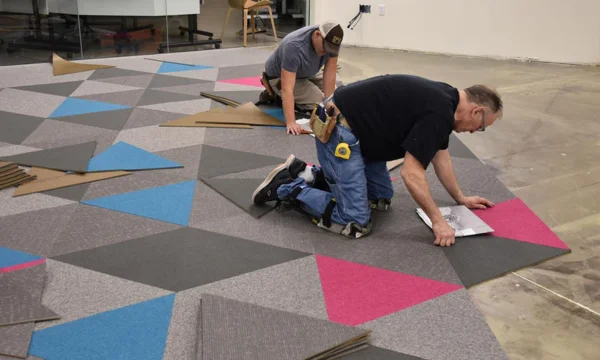
During Carpet installation, the first thing you should do is to place the tiles starting from your centre point, and after that, you can continue with the chalk lines. Adhesive should be applied to each tile very well for the purpose of better bonding. When laying down tiles, make sure that their edges are touching and not forced together. You should never let tiles overlap in any way while you are doing the installation. After a couple of rows, you can use a roller specifically designed for flooring to take credit for the total overlap of tiles and adhesive.
Cut Tiles for Edges and Corners
When you bear corners and openings, you will need to cut these carpet tiles for a flawless finish.
- Measure the area and gap by using a measuring tape.
- After converting the tiles upside down, mark the places where to cut. Use a sharp blade or knife for clean and aligned cuts.
- Always dry fit the cut part before applying any glue.
- After using the adhesive, put the cut tile snugly against the wall or corner.
- Wear strong hand gloves and safe gear, as these adhesives contain powerful chemicals.
Final Touches
After the installation process is final, check the floor for any loose corners, cracks or gaps. It is worth pressing them again if needed to achieve the desired results. Do not permit heavy foot traffic instantly after the adhesive has been applied. Give the adhesive a minimum of 24 hours to cure, and avoid walking on it during this time. Before the adhesive patches, remove the excess with a mop or a specific cleaner.
Maintenance Tips for Carpet Tiles
Proper maintenance and care are the factors that determine the longevity of these floor tiles. Regular cleaning and vacuuming will ensure that your carpet tiles stay clean and fresh. In case of spots, do immediate cleaning with a mild detergent and water. From time to time, rotate all the tiles to distribute the fading and wear evenly. The lifting, cleaning, and maintenance of these carpet tiles is a straightforward process.
Final Thoughts
Proper guidance and tools are needed for the installation of carpet tiles with gules. This not only improves the look of your room but also keeps the prices within your budget. With the right tools and a bit of patience, fixing the carpet tiles can be done without any hesitation. The guide provided above will help you achieve a floor that looks smooth and professional. Get ready to change your space. Contact Best Carpet Dubai for our carpet installation services delivered right to your doorstep.


